
Create Polygon Rooms
Now that we have easily accessible viewpoints, let’s add a series of rooms using AGi32’s Room tool. This will construct three-dimensional geometry with flat ceilings, workplane calculation points and user definable surface reflectances, colors and textures.
- Access the viewpoint “ST-11 and ST-10”.
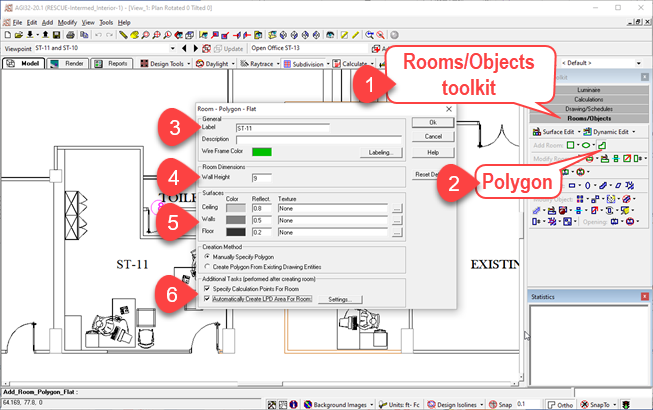
- Click on the Rooms/Objects toolkit.
- Select the Polygon Room type button.
ST-11
In the Room dialog that opens, make the following entries/selections:
- Enter ST-11 for the room Label.
- Enter ceiling height of 9’.
- Leave the reflectance color defaults unchanged.
- Check the “Automatically Create LPD Area…” box. The “Specify Calculation Points…” box is selected by default.
- Click OK to exit the dialog.
You are now ready to trace the room shape.
- Press F8 to enable Ortho to draw straight lines (if not already enabled, check the bottom toolbar).
- Turn off Snap (F9).
- Enable Snap-To (F3).
- Draw the shape as shown below.
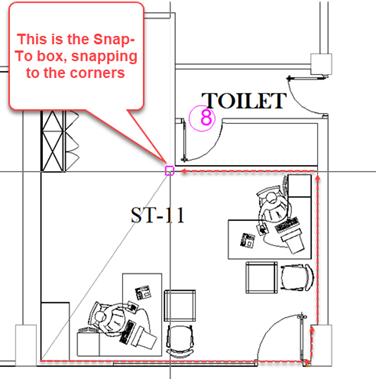
- When you have reached the final point in the upper left corner, with a straight line to the first point, click the right mouse button to close the room.
- The room geometry is now outlined in lime green and the dialog below will automatically open to assist in the placement of calculation points.
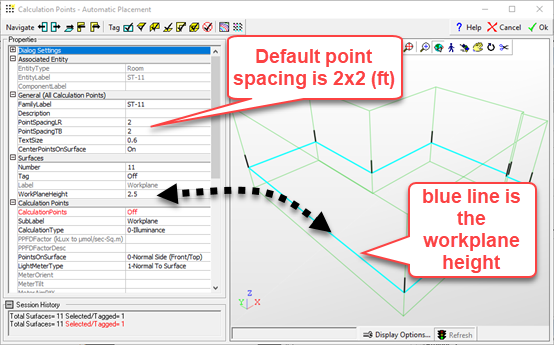
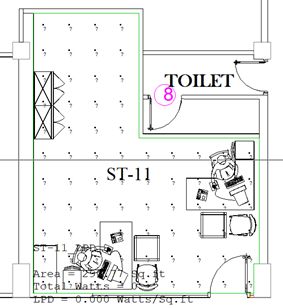
- Don’t make any changes this time, just click OK to accept the defaults. Your room should now have question marks where the calculation points are located as the values are not calculated yet (we have no lights!).
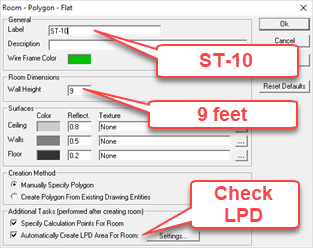
ST-10
Let’s repeat this process for Room ST-10 which is in the same viewpoint.
- Click on the Room- Polygon command again in the Rooms/Objects toolkit.
- Change the Label to ST-10.
- Change Wall Height to 9’ (should remember from last use).
- Check the LPD box at the bottom of the dialog (also should be remembered).
- Click OK to exit the dialog and trace the room.
- Remember to click the right mouse button to close the final side of the room polygon.
- When the calculation points dialog pops up after you have traced the room, just click ok to accept the defaults and place the points on the workplane.

ST-15
Moving on through the process of creating rooms, we have several more to complete.
- Access viewpoint ST-15.
Can you complete this room exactly like the previous two? Here are the steps again:
- Select the Room – Polygon command.
- Enter the Label (ST-15).
- Enter the Mounting Height (should already be 9).
- Check the LPD box (remembered).
- Click OK and trace the room (remember to trace the interior walls leaving space between adjacent rooms).
- Right click to close the final side.
- Click OK to close the calculation points dialog and accept defaults.

- Select viewpoint SW corner – Level 1.
 RESCUE
Open RESCUE-Intermed_Interior-2.AGI

